If you follow me on Instagram, you have probably seen our new entryway. I am so excited about how this space has been transformed.
Our New Entryway Project
The Entryway Before:
Last fall, I added some design elements like a colorful rug and family photos. It was an improvement, but the space still didn't feel complete. Not only did all of the white make the space feel too sterile, it was impossible to keep this high-traffic area looking clean. The walls always seemed to have dirt or scuff marks.
The New Entryway In Progress:
Charles and I discussed adding wallpaper to the entryway, but the samples we received didn't seem quite right. When Charles left for a long work trip, I got sick of the samples sitting in the hallway and became determined to transform the space before he got home.
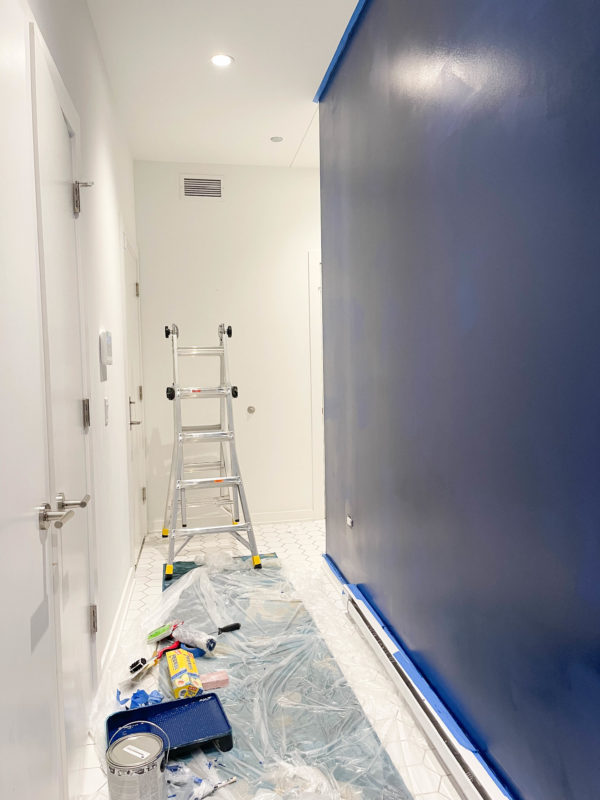
Sometimes I have a vision for a space before I start working. In this case, I started with paint. When I shared the progress with friends, they gave me ideas on how to finish the space.
Since I was surprising my husband with this project, I wanted to design around the rug since he had picked that out. My sister suggested going with dark blue paint to match the rug and add drama to the space. I mixed up a paint sample with my acrylic paints and took it over the Lowes, where it was color matched. Painting an entryway with eight doors and a 10-foot high ceiling wasn't easy, but I was able to do it on my own over the course of several days. Once the walls were done, the trim looked dirty in comparison, so I repainted it white.
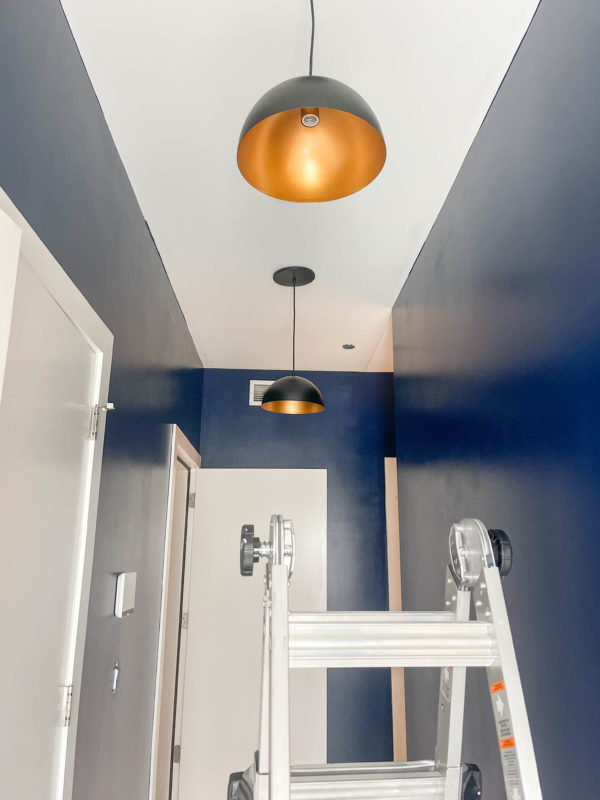
I hadn't planned to change the lighting, but my friend suggested it, so I did some research. The entryway had four can lights, and when I looked into having them replaced with pendants, I learned that can-to-pendant conversion kits exist. You just need to unscrew the lightbulbs for the cans and screw in the pendants! It couldn't be easier - or more affordable - each light was about $85!
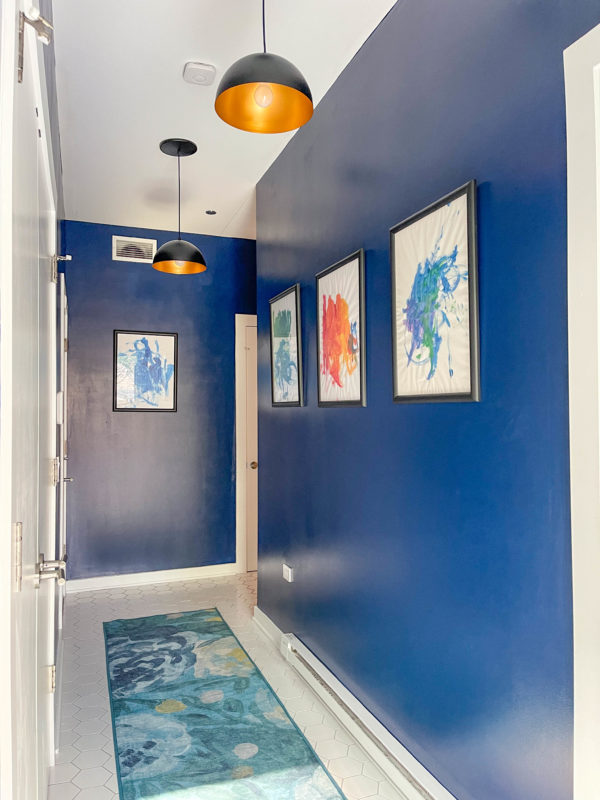
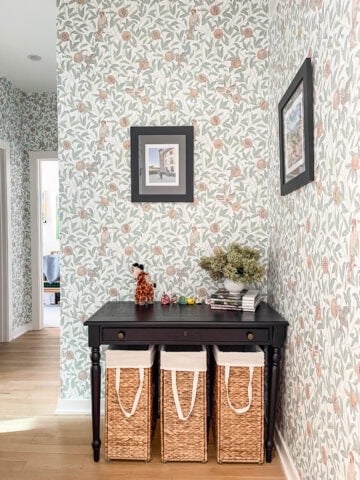
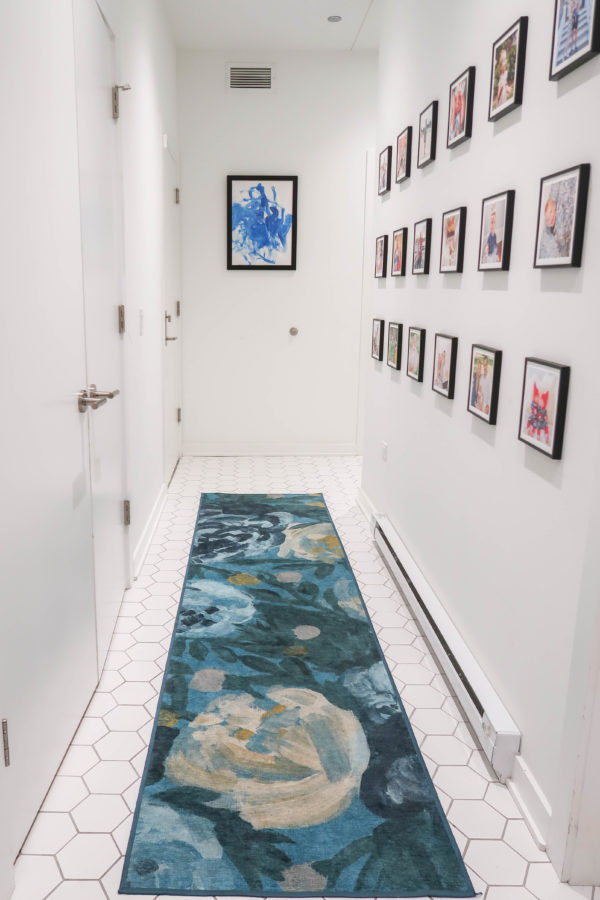
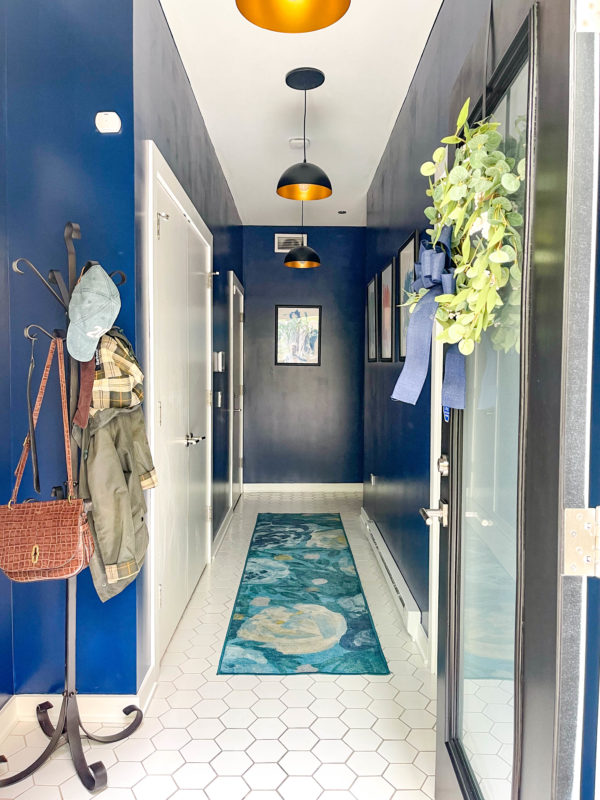
When I showed a photo of the freshly painted hallway with the pendant lights to a neighbor, she suggested adding more of Gwen's artwork. I had planned to put the Mixtiles back up, but they were too small for the large space. We had already framed the first painting that Gwen brought home from preschool and put it at the end of the hallway. I chose three more paintings to fill the long wall. I chose paintings that are all mostly monochromatic and with similar use of negative space so that the artwork has a more cohesive look.
The very last detail was adding a signature scent to the space. I want my home to smell like a fancy hotel and to really make a positive first impression on guests. I chose a Voluspa diffuser with the French Cade and Lavendar scent. It's noticeable without being overwhelming and it has a nice fresh floral scent.
The Final Result:
Charles was shocked when he came home! At first he kept saying that the blue was a bit bold, perhaps more bold than he would have chosen. He warmed up to it. A week later he told me that he really likes it.
I am so happy to have this space completed. Especially since it is a space that I see all the time. Making such a major change in such a short amount of time has given me the (much needed) motivation to finish up other spaces in our home. Currently, I am working on a powder room and the tv room/rec room.
Total Cost of the Project:
Four Can to Pendant Conversion Kits (there is an additional light around the corner): $393
Custom Frames from Art to Frames for Gwen's Paintings: $502
Paint and Painting Supplies: $205
Ruggable Runner: $209 (we already owned this)
Voluspa Diffuser: $42
Total: $1351
Want to see more of our home?