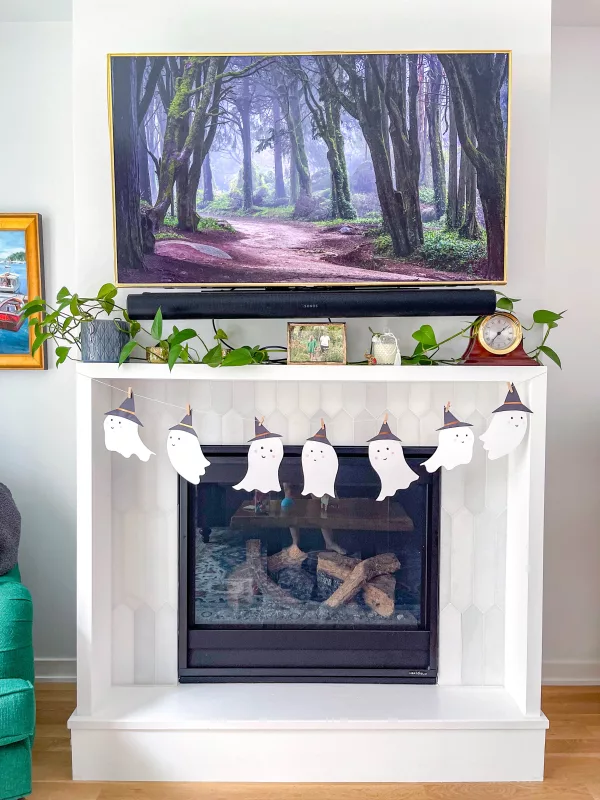
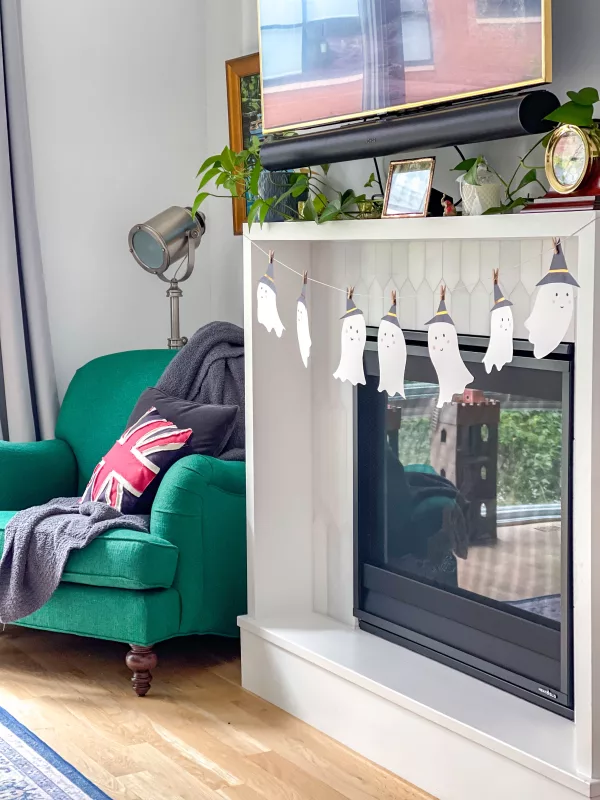
This Ghost Garland is such an easy DIY Halloween decoration. My four-year-old loves craft projects, and she especially adores Halloween. We made this ghost garland together, and it’s the perfect sweet and spooky addition to our fall decor.
Easy DIY Halloween Decoration: A Ghost Garland
Easy DIY Halloween Decoration Supplies
Ghost Garland Supplies:
Twine, String, or Ribbon
Mini Clothespins
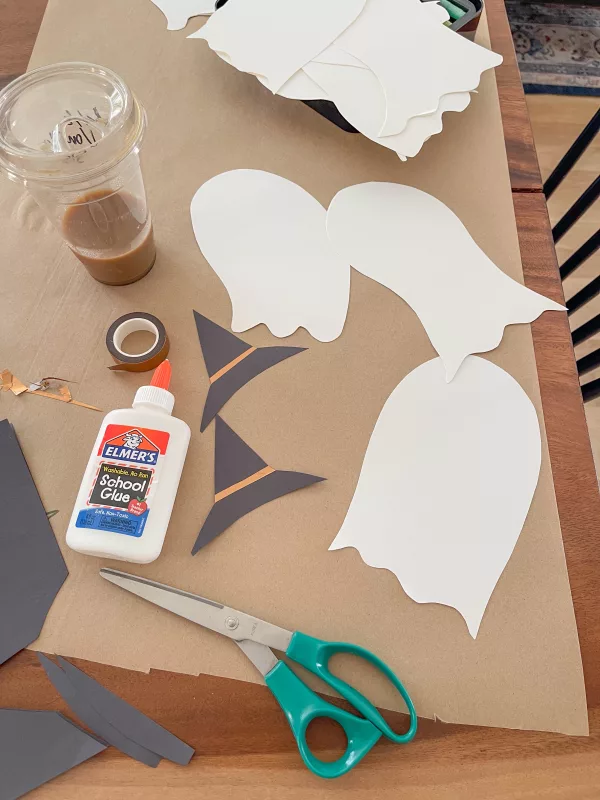
White and Black Construction Paper or Card Stock
Glue
Gold Washi Tape
Black and Pink Markers
This garland is made with a piece of twine and seven mini clothespins. I reuse the twine and mini clothespins to create a variety of seasonal garlands. For example, I’ve used them to hang construction paper hearts for Valentine’s Day, leaves for fall, and flowers for spring.
You can even cut out letters and spell out anything you like! If you like crafting and seasonal decor, you will find endless ways to decorate using mini clothespins on a string.
The mini clothespins are sold online at Amazon, and everything else is easy to find at Target or a craft store. If you are into crafting, you probably have most of the supplies on hand.
Easy DIY Halloween Decoration Instructions
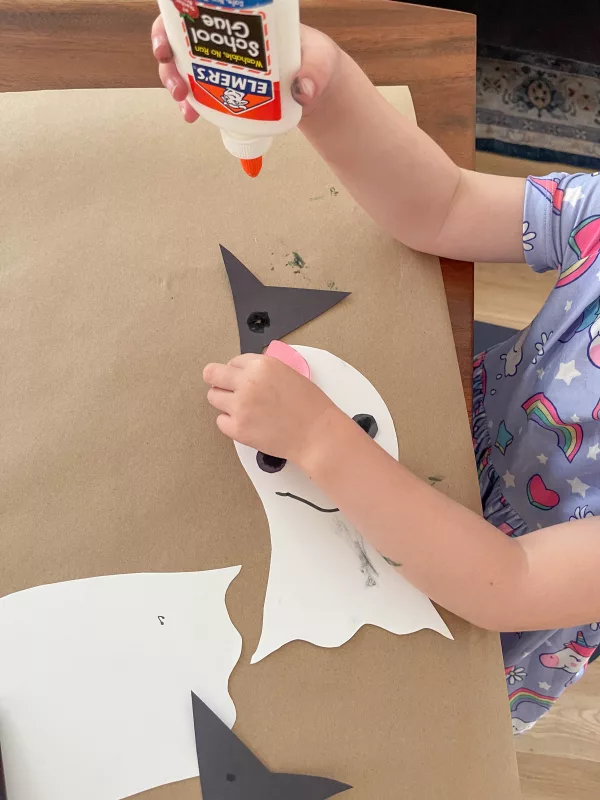
First, sketch out some ghosts on the white paper. I used one piece of construction paper to cut out two ghosts, but you may choose to make them larger or smaller. I doubled up the paper to cut out two ghosts at a time.
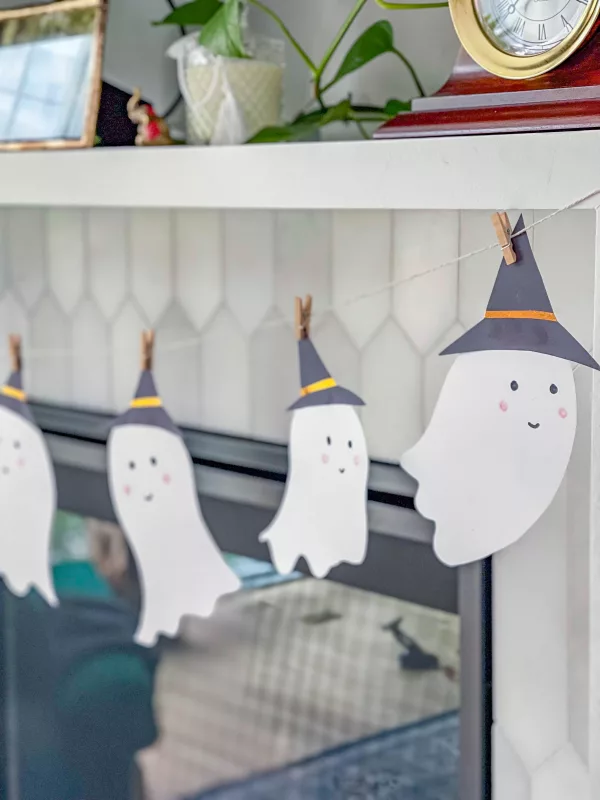
Once I had cut out ten ghosts, I moved on to cutting out black witch hats. Again, I cut out two at a time. I added a strip of gold washi tape to each hat.
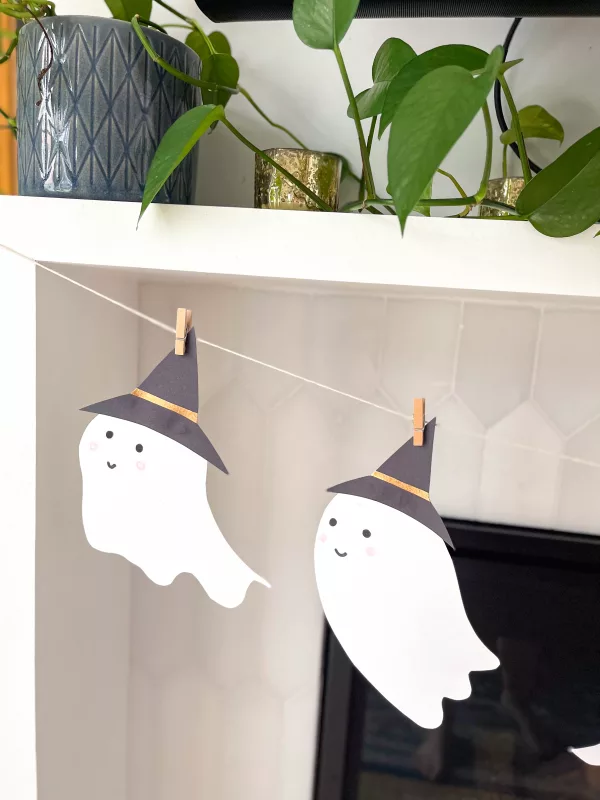
Next, I drew eyes and smiles on each ghost with a black marker. I added rosy cheeks with a pink marker, which makes the ghosts look friendlier.
Use glue to attach the witch hats to the top of the ghosts’ heads.
The final step is to assemble and hang the garland. I think it is easiest to hang the string, equally space the clothespins, and then hang up the ghosts.
More Ideas
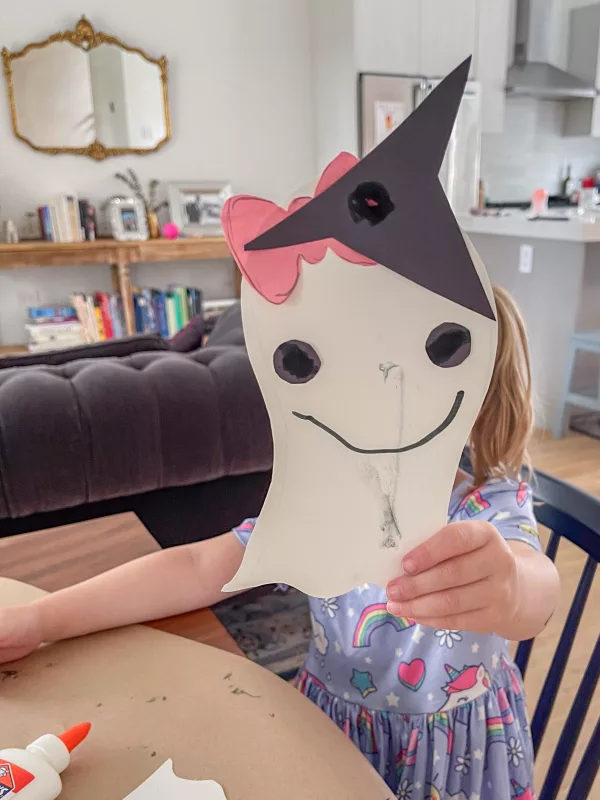
My daughter loves both ghosts and witches, so we opted to make ghosts with witch hats. You could swap the witch hats for party hats or bows. Or ditch the hats altogether.
This was a fun, family-friendly DIY Halloween decoration that made my Halloween-obsessed daughter very happy! If you make this ghost garland, please send me a photo on Instagram. I would love to see it!
Looking for some more Halloween inspiration?
Check out this post about Halloween decor.
